Chili’S Skillet Queso Dip Copycat
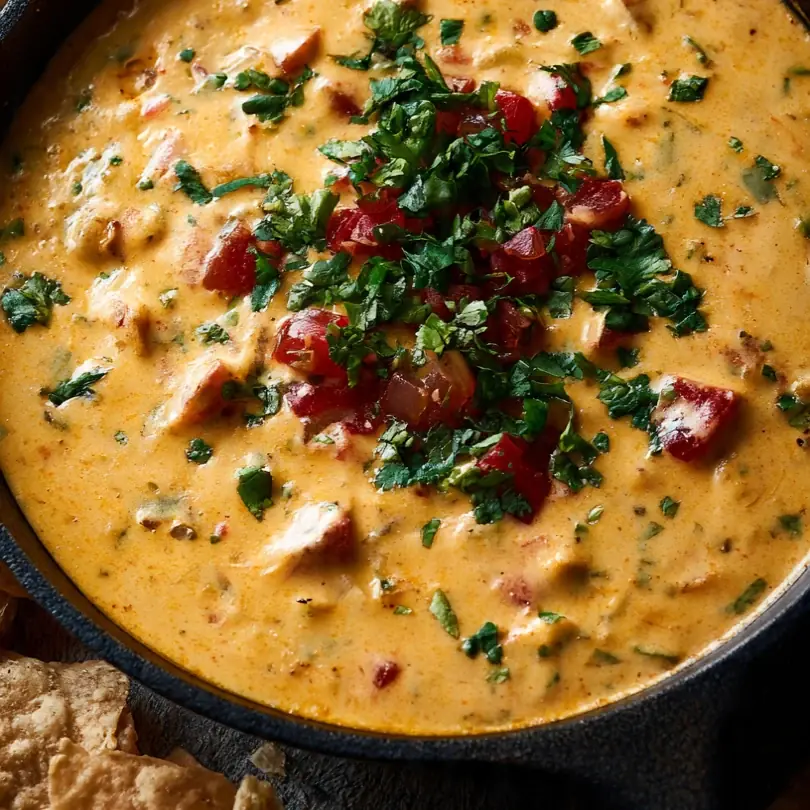
There’s something truly magical about a warm, bubbling bowl of cheesy dip, especially when it evokes memories of a favourite restaurant treat. Today, I’m thrilled to share my tried-and-tested recipe for a homemade version of Chili’s Skillet Queso Dip that brings all that nostalgic flavour right into your kitchen. We’re going to create a truly special dip that’s rich, creamy, and utterly moreish.
For years, I found myself craving that distinctive, savoury tang of Chili’s queso. As a home cook, my curiosity eventually got the better of me, and I embarked on a mission to recreate it. After countless attempts and a fair few adjustments, I stumbled upon this combination by accident, and it’s been a hit ever since. It’s a wonderful feeling to crack the code on a beloved dish and make it accessible for everyone to enjoy at home, whether it’s a dip, a full meal like a Panda Express Fried Rice Copycat or a Chick-Fil-A Grilled Chicken Club Copycat .com/panda-express-fried-rice-copycat/”>Panda Express Fried Rice Copycat , or a decadent dessert like a Cheesecake Factory Red Velvet Cheesecake Copycat.com/chick-fil-a-grilled-chicken-club-copycat/”>Chick-Fil-A Grilled Chicken Club Copycat.com/panda-express-fried-rice-copycat/”>Panda Express Fried Rice Copycat.
This recipe isn’t just about replicating a taste; it’s about crafting an experience. Imagine the aroma filling your home, the vibrant colours of the cheese and peppers, and the joy of dipping into that molten goodness. It’s a fantastic recipe to have in your repertoire, whether you’re hosting a casual get-together or simply want to treat your family to something truly delicious. My kids absolutely devour this every time I make it, and that’s always the highest praise in my book!
Recipe Overview
- Prep Time: 15 minutes
- Cook Time: 25-30 minutes
- Total Time: 40-45 minutes
- Servings: 6-8
- Difficulty: Easy to Moderate
Why You’ll Love This Chili’s Skillet Queso Dip Copycat
- Authentic Restaurant Flavour: This recipe captures the distinct, savoury, and cheesy notes that make the original dip so beloved, allowing you to enjoy that familiar taste without leaving your home.
- Customisable Heat Level: You have complete control over the spice, easily adjusting the amount of jalapeños or chilli powder to suit your preference, from mild and mellow to a fiery kick.
- Fresh, Wholesome Ingredients: By making it yourself, you know exactly what goes into your dip, using fresh vegetables and high-quality cheese for a more satisfying and flavourful result.
- Economical & Convenient: Preparing this dip at home is often more cost-effective than dining out and offers the convenience of having a delicious, warm queso ready whenever the craving strikes.
- Versatile Serving Options: Beyond just tortilla chips, this queso is fantastic drizzled over tacos, enchiladas, or even baked potatoes, making it a versatile addition to many meals and snacks.
Ingredients You’ll Need
- 300g lean ground beef (10-15% fat)
- 1 tablespoon olive oil
- 1 medium white onion, finely chopped
- 2 cloves garlic, minced
- 1 green bell pepper, finely diced
- 1 red bell pepper, finely diced
- 1 fresh jalapeño, deseeded and finely minced (adjust to taste for heat)
- 1 teaspoon ground cumin
- ½ teaspoon chilli powder
- ¼ teaspoon smoked paprika
- 400g can diced tomatoes, undrained
- 200ml whole milk
- 450g processed cheese block (e.g., Velveeta equivalent), cut into 2cm cubes
- 100g Monterey Jack cheese, grated
- Salt and freshly ground black pepper to taste
- Fresh coriander, chopped, for garnish
Tip: While a processed cheese block gives that signature smooth, creamy texture, you can experiment with adding a little extra mature cheddar or a touch of cream cheese for a different depth of flavour if you prefer.
How to Make Chili’s Skillet Queso Dip Copycat
- Begin by heating the olive oil in a large, heavy-bottomed frying pan or skillet over medium-high heat until it shimmers gently. Add the ground beef, breaking it up with a wooden spoon. Cook for 6-8 minutes, stirring occasionally, until the meat is thoroughly browned and no longer pink, and any rendered fat has been cooked out. Drain off any excess fat from the pan. The beef should look crumbly and have a rich, caramelised colour.
- Reduce the heat to medium. Add the finely chopped white onion, green bell pepper, red bell pepper, and minced jalapeño to the pan with the beef. Sauté for 5-7 minutes, stirring regularly, until the vegetables soften and become fragrant. You should notice the onions turn translucent and the peppers become tender-crisp, releasing a sweet aroma.
- Stir in the minced garlic, ground cumin, chilli powder, and smoked paprika. Cook for another 1 minute, stirring constantly, until the spices are incredibly fragrant and lightly toasted. The aroma will become wonderfully earthy and rich at this stage. Be careful not to let the garlic burn.
- Pour in the undrained can of diced tomatoes and the whole milk. Bring the mixture to a gentle simmer, stirring occasionally. Allow it to simmer for 3-5 minutes, letting the flavours meld and the mixture thicken slightly. You’ll see small bubbles breaking the surface, and the sauce will start to coat the back of your spoon.
- Gradually add the cubed processed cheese block to the simmering mixture, a handful at a time, stirring continuously until each addition has melted completely and is fully incorporated. This process will take about 5-8 minutes. The mixture will transform from a chunky sauce into a luxuriously smooth, glossy, and thick dip. Once all the processed cheese is melted, stir in the grated Monterey Jack cheese until it too has completely melted and blended into the dip, adding another layer of creaminess.
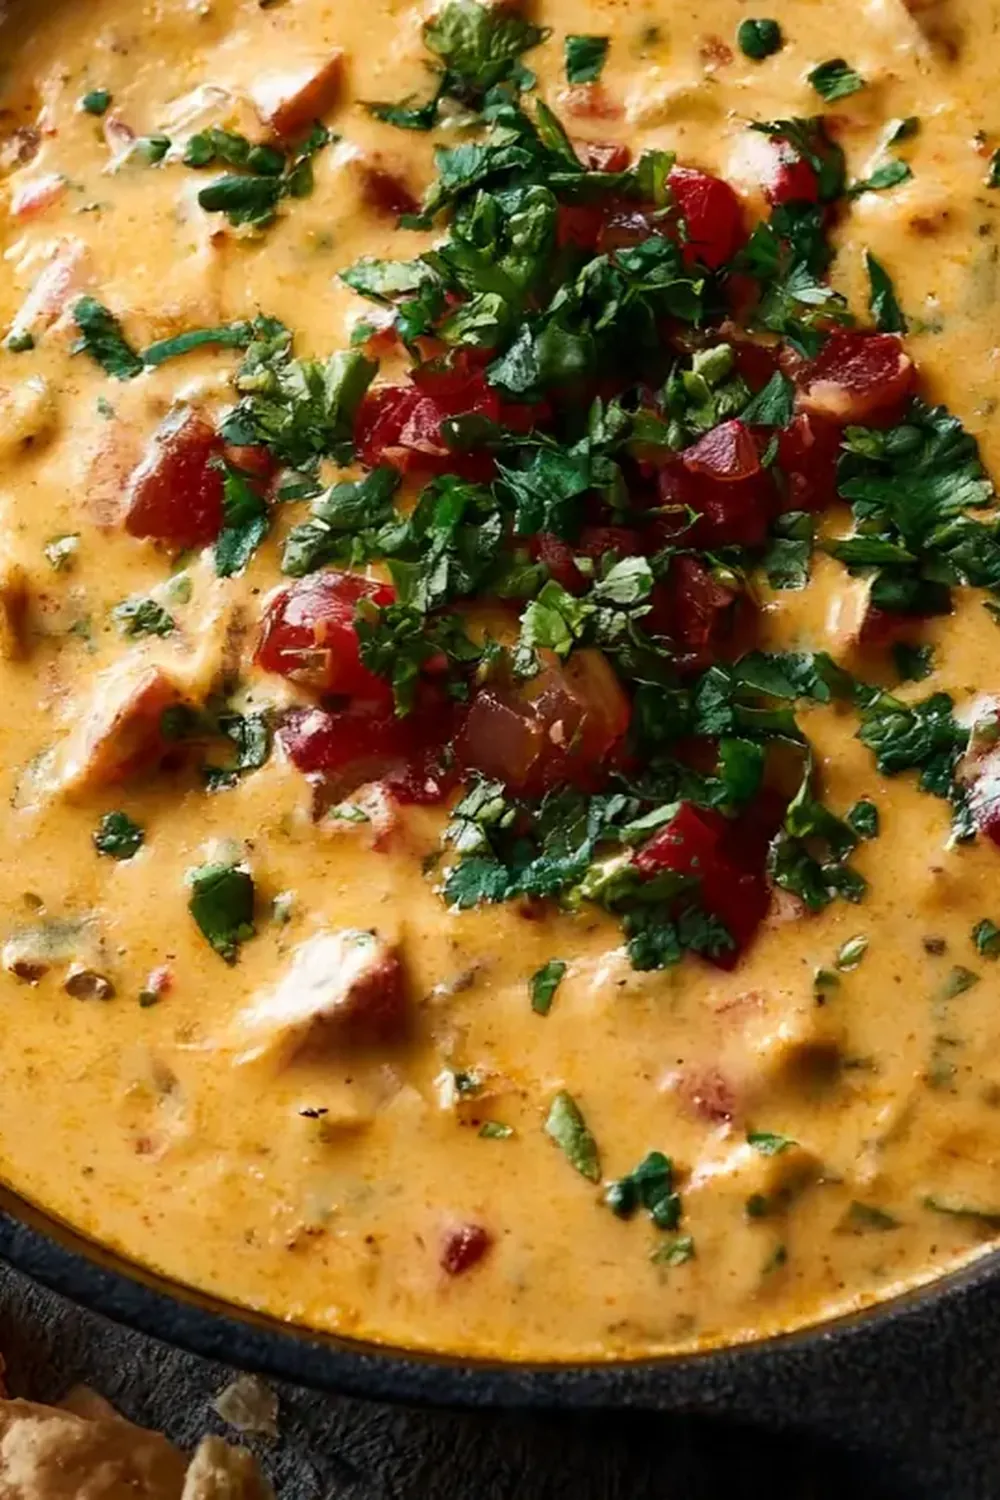
- Taste the queso and season with salt and freshly ground black pepper as needed. Remember that the processed cheese can be quite salty already, so taste before adding too much. Once seasoned to your liking, remove the pan from the heat. The queso should be bubbling gently, a rich, vibrant orange-yellow colour, and have a smooth, velvety texture that clings to your spoon. Garnish generously with fresh chopped coriander before serving immediately.
Tips From My Kitchen
- Control Your Heat: When working with fresh jalapeños, remember that most of the heat resides in the seeds and the white pith. If you prefer a milder dip, ensure you meticulously remove all seeds and pith. For those who enjoy a spicier kick, you can leave some seeds in or even add a second jalapeño. Always wear gloves when handling chillies to avoid skin irritation, and wash your hands thoroughly afterwards.
- Evenly Diced Vegetables for Texture: Taking the time to finely and uniformly dice your onions and bell peppers is crucial for the overall texture of the dip. Smaller pieces soften more quickly and integrate seamlessly into the cheesy mixture, ensuring every spoonful offers a smooth, consistent experience without large, crunchy vegetable chunks. It also helps them release their flavour more effectively.
- Drain the Beef Thoroughly: After browning your ground beef, it’s essential to drain off any excess fat. Leaving too much fat in the pan can result in a greasy dip that separates as it cools, affecting both the texture and the flavour. A lean mince is always a good start, but a quick drain ensures a cleaner, more appealing final product.
- Low and Slow for Smooth Melting: When adding the cheese, keep the heat at a gentle simmer, or even turn it off temporarily, especially when incorporating the processed cheese. High heat can cause cheese to seize, become grainy, or even burn at the bottom of the pan. Adding it gradually and stirring constantly ensures a silky-smooth, lump-free queso. This gentle approach helps the cheese emulsify properly.
- Fresh Coriander is Key: While often seen as a garnish, fresh coriander (cilantro) plays a significant role in brightening the overall flavour of this rich dip. Its fresh, citrusy notes cut through the richness of the cheese and beef, providing a lovely contrast and enhancing the authentic taste. Don’t skip it, and consider sprinkling some extra over individual servings.
- Serving Temperature Matters: Queso is best enjoyed warm and gooey. If you’re not serving it immediately, you can keep it warm in a slow cooker on a ‘keep warm’ setting, stirring occasionally to prevent a skin from forming. If reheating, do so gently on the hob over low heat, adding a splash of milk to loosen it if it’s become too thick.
Equipment You’ll Need
- Large frying pan or skillet
- Sharp knife and cutting board
- Mixing bowls
- Wooden spoon or spatula
What to Serve With Chili’s Skillet Queso Dip Copycat
- Crispy tortilla chips
- Warm flour tortillas or pita bread
- Fresh vegetable sticks (carrots, celery, cucumber)
- As a topping for tacos, nachos, or burritos
- Drizzled over baked potatoes or French fries
Frequently Asked Questions
Chili’s Skillet Queso Dip Copycat
Ingredients
Method
-
Begin by heating the olive oil in a large, heavy-bottomed frying pan or skillet over medium-high heat until it shimmers gently. Add the ground beef, breaking it up with a wooden spoon. Cook for 6-8 minutes, stirring occasionally, until the meat is thoroughly browned and no longer pink, and any rendered fat has been cooked out. Drain off any excess fat from the pan. The beef should look crumbly and have a rich, caramelised colour.
-
Reduce the heat to medium. Add the finely chopped white onion, green bell pepper, red bell pepper, and minced jalapeño to the pan with the beef. Sauté for 5-7 minutes, stirring regularly, until the vegetables soften and become fragrant. You should notice the onions turn translucent and the peppers become tender-crisp, releasing a sweet aroma.
-
Stir in the minced garlic, ground cumin, chilli powder, and smoked paprika. Cook for another 1 minute, stirring constantly, until the spices are incredibly fragrant and lightly toasted. The aroma will become wonderfully earthy and rich at this stage. Be careful not to let the garlic burn.
-
Pour in the undrained can of diced tomatoes and the whole milk. Bring the mixture to a gentle simmer, stirring occasionally. Allow it to simmer for 3-5 minutes, letting the flavours meld and the mixture thicken slightly. You’ll see small bubbles breaking the surface, and the sauce will start to coat the back of your spoon.
-
Gradually add the cubed processed cheese block to the simmering mixture, a handful at a time, stirring continuously until each addition has melted completely and is fully incorporated. This process will take about 5-8 minutes. The mixture will transform from a chunky sauce into a luxuriously smooth, glossy, and thick dip. Once all the processed cheese is melted, stir in the grated Monterey Jack cheese until it too has completely melted and blended into the dip, adding another layer of creaminess.
-
Taste the queso and season with salt and freshly ground black pepper as needed. Remember that the processed cheese can be quite salty already, so taste before adding too much. Once seasoned to your liking, remove the pan from the heat. The queso should be bubbling gently, a rich, vibrant orange-yellow colour, and have a smooth, velvety texture that clings to your spoon. Garnish generously with fresh chopped coriander before serving immediately.
Notes
There you have it – my cherished recipe for a Chili’s Skillet Queso Dip copycat that I genuinely believe rivals the original. It’s a dish that never fails to bring smiles to faces around my kitchen table, and I hope it does the same for yours. Whether you’re dipping, drizzling, or simply enjoying a spoonful, this queso is a true delight.
Do let me know in the comments below if you give this a try, and what you think of it! I always love hearing about your culinary adventures.